Whammy Parts
Cart
Empty
Show Cart
Qty:
Price:
Cart
Empty
FAQ's
Download Manuals
Contact Us
Parts by Make/Model
Kahler Parts
22xx Pro Tremolo - CAM
23xx Pro Tremolo - CAM
2330 Flyer Tremolo - CAM
4200 X-Trem Tremolo - CAM
4300 X-Trem Tremolo - CAM
7200 Hybrid Tremolo - CAM
7300 Hybrid Tremolo - CAM
33xx Pro Bridge - No Route
7330 Hybrid Bridge - No Route
25xx Traditional - Fulcrum
2710 Killer - Fulcrum
2720 Spyder - Fulcrum
2760 Steeler - Fulcrum
All Bass Tremolos
All Bass Bridges
Stringlocks
Locknuts
Accessories
Fender Parts
System 1 - Japan
System 2 - Japan
System 3 - Japan
Vintage - USA
Vintage - Asia
Vintage - Mexico
2 Post - USA
2 Post - Asia
2 Post - Mexico
Free Flyte - USA
Elite - USA
Mustang
Charvel Parts
Brass Model 1005B
Brass Model 3003
Floyd Rose Tremolo Parts
Floyd Rose Locking Nuts
Gibson Tremolo Parts
Gibson Super Tune Vibrola
Gibson Super Tune Stringlock
Accutune Parts
Accutune I
Accutune II
Peavey Parts
Tracer, Nitro, Vandenberg
Wilkinson/ Gotoh Tremolo Parts
VS-100
Ibanez Tremolo Parts
Pro Rock'r
Parts by Type
Arms
Mounting Hardware
Routing Templates and Adapters
Bridges
Saddles
Rollers
Saddle Hardware
Fine Tuning Knobs
Locknuts and Stringlocks
Clamp Plates
Locknut and Stringlock Hardware
Springs
Tools
Whammy Deals!
Whammy's got the shit!
Whammy Parts ships worldwide every weekday.
Made in the USA!
Genuine Kahler Parts
Whammy Parts online is the official parts and service dept. for Kahler International Inc.
Made in Germany!
Original Floyd Rose Parts
We carry Schaller/ Floyd Rose parts from Germany that fit the Original Floyd Rose (OFR) tremolo.
Made in Japan!
Fender Contemporary Parts
We have tremolo parts for the 1983-1987 Fender System I, System II, System III, Elite, Free Flyte, Vintage and 2 Post systems.
Parts by Make/Model
Category
Parts by Make/Model
Parts by Type
Category
Parts by Type
Featured Products
SKU:
5377
Diagram #
053
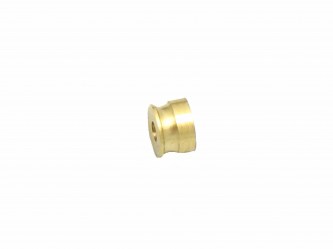
Saddle - Long Fork - Brass Roller
Price:
$24.00
Options:
Color:
-- Select --
Chrome
Gold
Black (Out of stock)
Select an option
Product details
SKU:
4007G
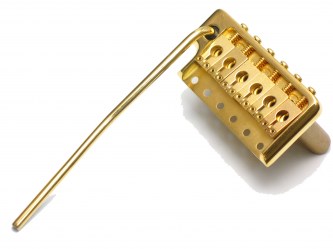
PRS Tremolo, Made in USA - Gold
Price:
$169.00
Product details
SKU:
9708
Fender System 1 Brass Roller
Price:
$7.00
Product details
SKU:
9756
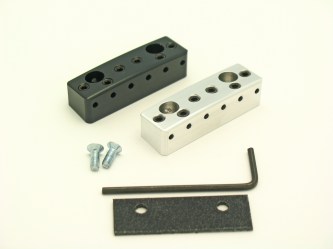
Fender Contemporary System 3 Stringlock
Price:
$60.00
Options:
Color:
-- Select --
Polished
Black (Out of stock)
Select an option
Product details
SKU:
5513
Diagram #
079
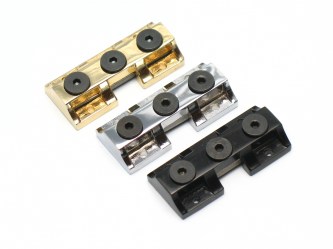
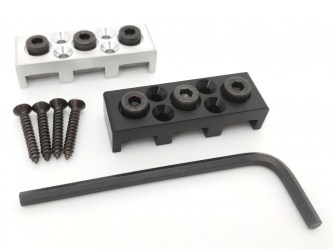
Kahler Standard String Lock
Price:
$40.00
Options:
Color:
-- Select --
Chrome (Out of stock)
Gold (Out of stock)
Black (Out of stock)
Black Nickel (Out of stock)
Out of stock
Product details
SKU:
8411
Diagram #
036
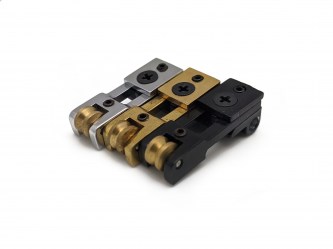
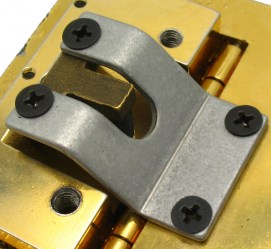
Locking Clip for Kahler CAM Tremolos
Price:
$12.00
Product details
SKU:
9720
Fender System 1 & 2 Stringlock
Price:
$50.00
Options:
Color:
-- Select --
Polished (Out of stock)
Black
Select an option
Product details
Whammy Parts © 2024
Back to Top